What is Media Hygene wordpress plugin?
Media hygiene or many times it is called as Media Hygene, is the practice of optimizing and managing media files on your WordPress website to improve performance, security, and user experience. This involves tasks such as compressing images, removing unused media, and organizing your media library.
Why is Media Hygiene Important in WordPress?
WordPress websites often rely heavily on images and other media files. If these files are not optimized, they can significantly slow down your website’s loading time. A slow website can negatively impact your search engine rankings, user engagement, and overall website performance.
Common Media-Related Issues in WordPress Websites:
- Large Image Sizes: Unoptimized images can significantly increase page load times.
- Unused Media Files: Cluttered media libraries can slow down your website and make it harder to manage.
- Broken Image Links: Broken links can degrade the user experience and harm your website’s SEO.
- Security Vulnerabilities: Improperly secured media files can be exploited by hackers.
Why Use a Media Hygiene WordPress Plugin?
A media hygene WordPress plugin can automate many of the tasks involved in optimizing and managing your media files. This can save you time and effort while improving your website’s performance.
By using a media hygiene WordPress plugin, you can:
- Improve Website Performance: Reduce page load times by compressing images and optimizing media files.
- Enhance SEO: Improve your website’s search engine rankings by optimizing image alt tags and file names.
- Strengthen Security: Protect your website from security vulnerabilities by removing unused media files and limiting access to sensitive media.
- Simplify Media Management: Organize your media library and easily find and manage your media files.
Installation Steps of Media Hygiene WordPress Plugin
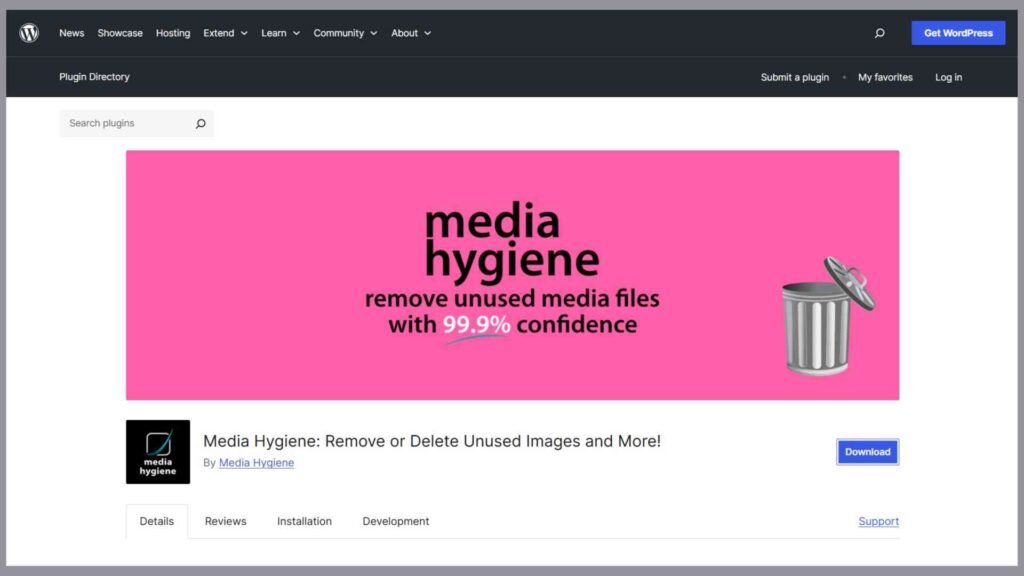
The Media Hygene WordPress plugin helps you organize, clean, and optimize your media library by removing unused images and other media files that may be taking up unnecessary space. Here’s a guide on how to use the Media Hygiene plugin after installation:
1. Install and Activate the Media Hygene WordPress Plugin

- Go to Plugins > Add New in your WordPress dashboard.
- Search for “Media Hygiene” and install it.
- Once installed, click Activate to enable the plugin.
2. Access the Media Hygiene Settings

- After activation, go to Media > Media Hygiene in the WordPress admin menu. This section will contain all of the options for scanning, reviewing, and cleaning up your media files.
3. Run a Scan for Unused Media
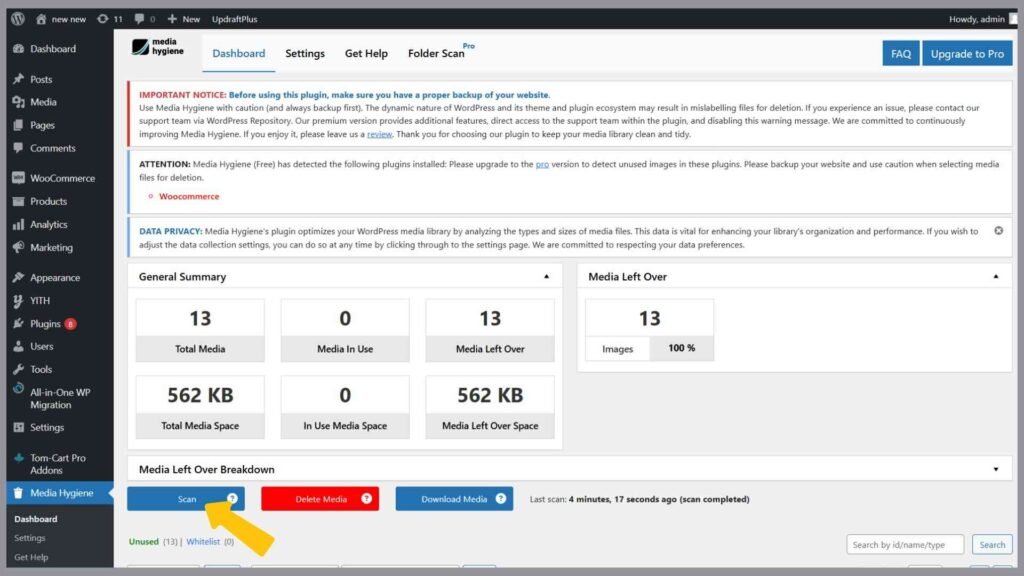
- Click on the Scan button to start a scan of your media library.
- The plugin will identify media files that are not currently being used in any posts, pages, or custom post types. This may take a few minutes depending on the size of your media library.
4. Review Scan Results
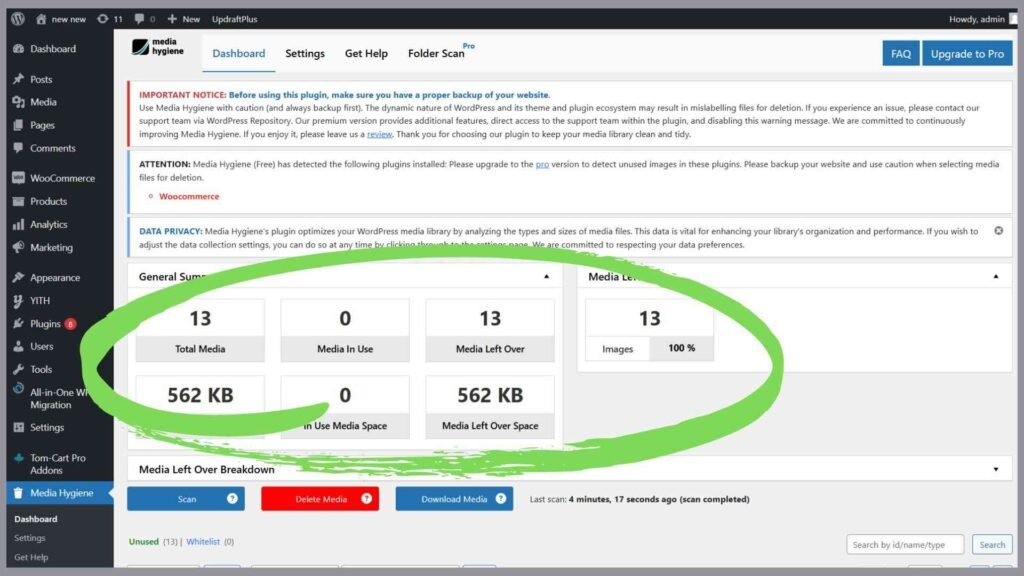
- After the scan completes, a list of unused or orphaned media files will be displayed.
- Review the list carefully to ensure that these files are truly unnecessary. Media Hygiene may flag some images or files that you want to keep (e.g., files used by custom themes or plugins), so it’s essential to double-check the list.
5. Delete Unused Media Files
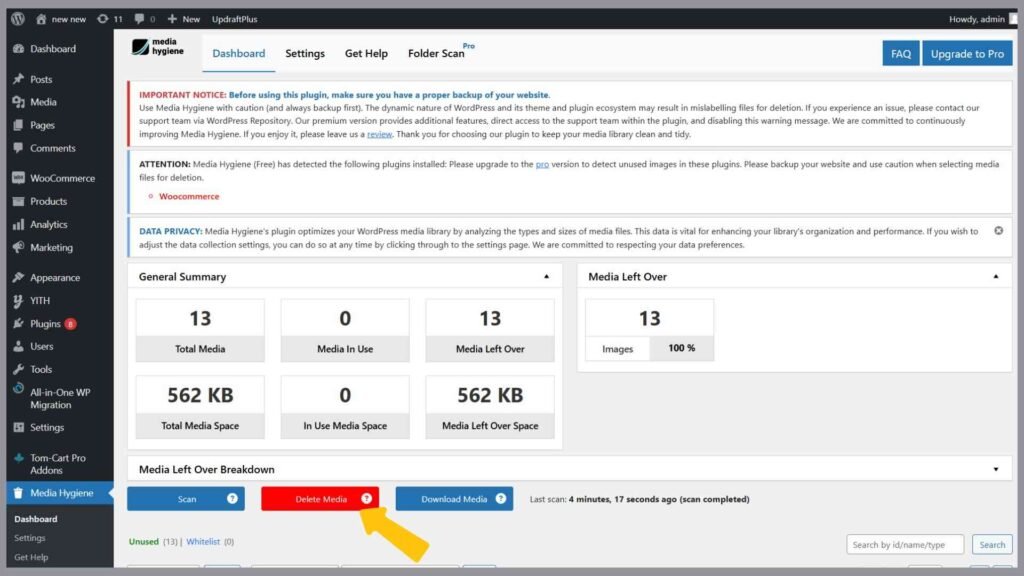
- Select the files you want to remove, or choose Select All if you’re sure about deleting all unused files.
- Click the Delete button to remove the selected files from your media library and server.
- Media Hygiene may offer options to move the deleted files to a temporary “Trash” or “Backup” folder instead of immediately deleting them, so you can recover them if needed.
6. Optimize Your Media Library Regularly
- It’s a good practice to periodically scan and clean your media library using Media Hygiene to keep your site’s storage optimized and your database streamlined.
7. Additional Settings
- Some versions of Media Hygiene allow you to set up automatic scans or exclusions for files you want to keep.
- Check the Settings tab within Media Hygene WordPress Plugin to configure any additional options or preferences, such as scheduling scans or excluding specific folders or file types from the scan.
By regularly running Media Hygiene, you can keep your media library organized and prevent unused files from taking up valuable server space, helping to keep your site running smoothly and efficiently.
Core Features of a Media Hygiene WordPress Plugin
A robust media hygene WordPress plugin offers a range of features to optimize and secure your website’s media files. Here are some of the key features to look for and for more features you can search on Google:
| 📷 Feature Category | 📊 Feature | 📄 Description |
|---|---|---|
| 📷 Image Optimization | 📸 Automatic Resizing and Compression | Automatically resize and compress images to reduce file size without compromising quality. |
| 📹 Conversion to Web-Friendly Formats | Convert images to web-friendly formats like WebP to reduce file size and improve loading times. | |
| 📺 Lazy Loading | Defer the loading of images until they are about to be viewed, improving initial page load speed. | |
| 📻 Media Cleanup | 📸 Identifying and Removing Unused Media Files | Automatically identify and remove unused or orphaned media files to declutter your media library and improve performance. |
| 📼 Deleting Broken Image Links | Find and fix or remove broken image links to enhance user experience and avoid 404 errors. | |
| 📽 Media Organization | 📸 Categorizing and Tagging Media Files | Organize your media library by categorizing and tagging files for easy searching and retrieval. |
| 📾 Creating Custom Media Libraries | Create custom media libraries to group related media files for specific projects or sections of your website. | |
| 📿 Security | 📸 Protecting Media Files from Unauthorized Access | Implement security measures to prevent unauthorized access to your media files, reducing the risk of data breaches. |
| 🔀 Implementing Security Measures to Prevent Malicious Attacks | Protect your website from malicious attacks by regularly updating your WordPress core, themes, and plugins, as well as using strong passwords and security plugins. |
Conclusion
By implementing effective media hygiene practices and utilizing a reliable media hygene WordPress plugin, you can significantly improve your website’s performance, security, and user experience. By optimizing your media files, organizing your media library, and taking necessary security measures, you can enhance your website’s overall health and success.
We encourage you to adopt these best practices and consider using a media hygiene plugin to streamline the process.
1. What is a Media Hygiene WordPress Plugin?
A Media Hygiene WordPress Plugin is a tool designed to optimize and manage your website’s media files efficiently.
2. Why Use a Media Hygiene Plugin?
Using a Media Hygiene Plugin can significantly improve your website’s performance, SEO, security, and overall media management.
3. Key Features of a Media Hygiene Plugin?
Key features typically include:
- Image optimization
- Media cleanup
- Media organization
- Security features
4. How to Choose a Media Hygiene Plugin?
When selecting a Media Hygiene Plugin, consider:
- Ease of use
- Feature set
- Performance impact
- Security measures
- Customer support
5. Media Hygiene Best Practices?
To maintain media hygiene, follow these best practices:
- Optimize images
- Organize your media library
- Remove unused media
- Implement strong security measures
- Keep WordPress updated
6. What are the Benefits of Using a Media Hygiene Plugin?
Benefits of using a Media Hygiene Plugin include improved website performance, enhanced SEO, stronger security, and simplified media management.
7. How Can I Improve My Website’s Media Hygiene?
To enhance your website’s media hygiene, consider:
- Using a media hygiene plugin
- Optimizing images
- Organizing your media library
- Removing unused media
- Implementing security measures


