WordPress Theme
LEGALBLOW
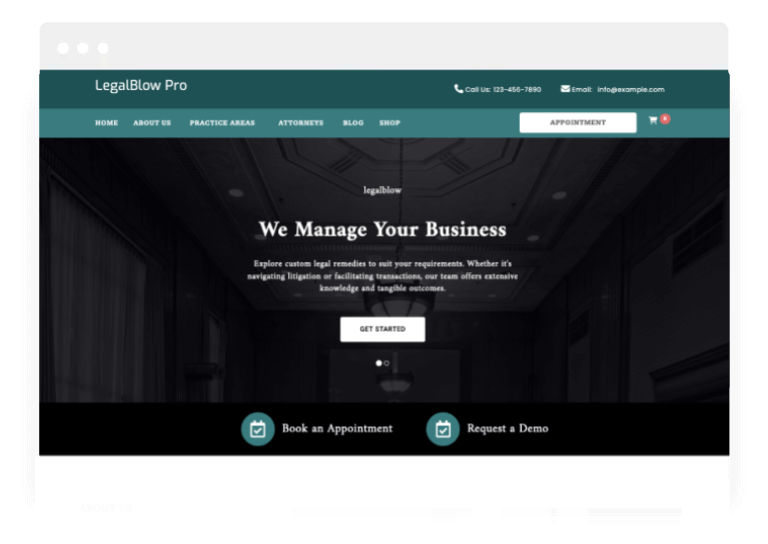
Elevate your legal practice with our custom WordPress theme designed specifically for law firms, attorneys, and lawyers. Transform your online presence with captivating designs and robust functionality.

With 100% Money Back Guarantee
Core Features
Filled with numerous features that you're bound to adore!
BootStrap Framework
LegalBlow leverages the widely acclaimed Bootstrap framework, renowned for its popularity. With its pre-built elements, crafting new sections becomes a breeze for users of all skill levels.
Translation Ready
LegalBlow boasts translation-ready capabilities, empowering you to seamlessly convert your website into any language, thus broadening your reach and engaging a diverse array of customers.
Custom Colors
Custom Widgets
In the free version, LegalBlow also provides widgets. Simply drag and drop your desired widget and save with utmost ease.
Sticky Header
LegalBlow features a sticky header functionality, eliminating the need to scroll up repeatedly for menu selection, and enhancing user convenience.
Google Map
LegalBlow enables seamless integration of Google Maps. Easily incorporate a map using a widget within the page builder interface.
Cross Browsers
The LegalBlow theme ensures cross-browser compatibility, guaranteeing consistent appearance and functionality across all major browsers when accessing your website.
SEO Friendly
In developing LegalBlow, we prioritized the SEO aspect. The HTML structure is meticulously crafted with cleanliness and includes appropriate tags to enhance search engine optimization.
Preloader Options
LegalBlow offers a preloader option for your website. You have the flexibility to either add your custom preloader through settings or disable it altogether.
1 Click Demo Import
Easily replicate the live preview appearance of your website by accessing the Import Demo Data menu within the Appearance section. Simply click on the Import Demo Data button to complete the process.
Clear Documentation
LegalBlow features comprehensive documentation. Each setting is accompanied by a concise description within the documentation for easy reference.
Video Tutorials
We are in the process of creating video tutorials for the LegalBlow theme to assist our customers in setting up the theme effortlessly. Stay tuned for the upcoming videos!
Theme Upgrade
What are the Benefits of Upgrading to Our PRO Addons?
Feature
Free Theme
Pro Addons Plugin
Favicon, Logo, Title and Customization
Customizer Theme Options
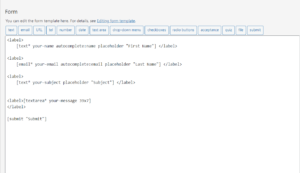
Contact Form
Sidebar Options (Full, Left and Right)
Color Settings
Footer Widget Columns
Sticky Header Option
1 Click Demo Import
1 Click Demo Import
Breadcrumb Display
Elementor Page Builder
Top Social Icons
800+ Fonts Settings
Default Slider
Typography
Footer Credits Editor
Footer Social Icons
WooCommerce Ready
Extra Customizer Settings
Extra Premium Demos
Priority Support
How to use the theme?
LegalBlow Theme Instructions
Step 1) First of all install this theme by going to Appearance->Themes->Add New. Upload legalblow.zip and install it.
Step 2) You’ll see a welcome screen upon activation. Click on the button Get Started with Legal Blow. It will automatically redirect you to the demo import page
Step 3) Select your demo. Click on Import Demo button. A new window will open along with the required plugins. Click the Continue & Import button to continue and wait for the process to finish.
1) First of all, set your page (Let’s say your page name is home ) to Frontpage. To do this go to Settings -> Reading and then select your homepage as a static page and choose your page ( ie home) on the homepage dropdown. Save changes.
Step 1) Go to Appearance->Customize
Step 2) Click on Site Identity Tab.
Step 3) Upload a logo of your own.
Step 4) Save & Publish
Go to Menus from Appearance-> Menus.
Step 1) Create a new menu.
Step 2) Select pages from left and add it to menu
Step 3) After this Select Theme Locations Primary from bottom and click Save Menu
Step 2) Scroll down to Footer copyrights text
Step 3) Enter your content
Step 4) Save & Publish
Step 1) Click on Appearance -> Customize -> Preloader Settings
Step 2) Choose your settings
Step 3) Save & Publish
Step 1) Go to Appearance -> Customize -> Blog Settings
Step 2) Choose settings and publish
Step 1) Go to Appearance -> Customize -> Additonal CSS
Step 2) Paste this CSS
.fa, .fas {
font-family: FontAwesome;
}
Step 3) Save & Publish
Step 1) Go to Pages->Add New
Step 2) Enter Page Title for eg About
Step 3) Click on the blue button Edit with Elementor
Note: You’ll need Elementor Page Builder plugin to do this.
Step 1) Click on Appearance -> Customize -> Page Settings
Step 2) Enable Page Title Section to show page title
Step 3) Enable Breadcrumb Type
Step 4) choose Background color
Step 5) Enable / Disable Dark Overlay to show a dark overlay over page header background
Step 6) Adjust page title height settings
Step 7) Save & Publish
Note: 1) For NavXT Breadcrumb You’ll need Breadcrumb NavXT plugin to do this.
2) For YOAST Breadcrumb You’ll need YOAST Seo plugin to do this.
Step 1) Click on Appearance -> Customize -> Color Settings
Step 2) select the desired Color Option from given settings
Step 3) Save & Publish
Step 1) Click on Appearance -> Customize -> Header Settings -> Menu
Step 2) Enable Menu Last Button option
Step 3) Save & Publish
Step 1) Click on Appearance -> Customize -> Header Setting-> Top Bar
Step 2) Insert your social media links in the given textbox for eg facebook , X , pinterest
Step 3) Publish
Step 1) Click on Appearance -> Customize -> Sticky Header Settings (pro)
Step 2) Change your settings in Enable Sticky Header Feature
step 3) choose a logo for Sticky Header
Step 4) Publish
Step 1) First of all go to Pages -> All Pages. You will see list of all the pages. Now click on any page you want and open it with Elementor page builder.
Step 2) Once it open up with the page builder now search for Slider element in the search widget at the top left of the page builder.
Step 3) You will find a slider widget after searching it. Just drag the widget onto the right of the page and start customizing it.
Step 3) Save & Publish
Step 1) Click on Appearance -> Customize -> Typography Settings (pro)
Step 2) Choose Body Typography, Headings Typography or Menu Typography from the tab
Step 3) Once selected, select the desired font from the dropdown provided.
NOTE: You can also set the other settings like font weight and font size etc
Step 4) Save & Publish.
Note: If you’re using the Elementor page builder for creating pages then you can directly change the font sizes and font-family from Elementor editor. However if you’re using Gutenberg you can change font sizes from the Gutenberg editor and font-family from the Typography Settings Settings
Step 1) Click on Appearance -> Customize -> Footer Settings (pro)
Step 2) Disable Show Credit Link option
Step 3) Save & Publish
Step 1) Click on Appearance -> Customize -> Footer Settings (pro)
Step 2)choose the number of Footer Columns
Step 3) Save & Publish
Step 1) Click on Appearance -> Customize -> Color Settings (pro)
Step 2) select the desired Color Option from given settings
Step 3) Save & Publish
Step 1) Go to Appearance -> Customize -> Blog Settings (pro)
Step 2) Choose settings and publish
Step 1) Go to Appearance -> Customize -> Shop Settings (pro)
Step 2) Choose settings and publish
Step 1) Go to Appearance -> Customize -> Shop Settings (pro)
Step 2) Enable Menu Cart
Step 3) Save and publish
Note: The images used in the demo are for demonstration purpose only. We recommend you to use your own images. Please check image copyrights before using an image.
videos
LegalBlow Video Tutorials
Premium Demos
LegalBlow Pro Demo
DEMO 1

100% Money Back Guarantee
FAQ's
Frequently Asked Questions
No, this plugin is specially made for the LegalBlow theme to enhance its features.
Choose Your LegalBlow Pro Plan
Select the perfect plan for your needs.
- 800+ Fonts Settings
- Default Slider
- Typography
- Footer Credits Editor
- WooCommerce Ready
- PRO Demos
- Check complete list above..
- 800+ Fonts Settings
- Default Slider
- Typography
- Footer Credits Editor
- WooCommerce Ready
- PRO Demos
- Check complete list above..
- 800+ Fonts Settings
- Default Slider
- Typography
- Footer Credits Editor
- WooCommerce Ready
- PRO Demos
- Check complete list above..
Checkout Our All-in-One PRO Bundle
All plans include our all pro plugins and themes updates.
- Unlock all PRO themes/plugins with a single license
- Access to all Pro Bundle features
- All themes demos
- Includes all pro features
- Premium Support
- New PRO themes/plugins during subscription
- Cancel subscription anytime
Annual plans include a 7-day money-back guarantee
- Unlock all PRO themes/plugins with a single license
- Access to all Pro Bundle features
- Lifetime product use
- All themes demos
- Includes all pro features
- Lifetime Premium Support
- Lifetime Updates
- All new PRO themes/plugins forever
Lifetime plans include a 7-day money-back guarantee

