Why You Need This Conversion Magic
Converting your meticulously crafted PSD (Photoshop Document) designs into fully functional WordPress websites unlocks a realm of possibilities that seamlessly blend creative design freedom with practical website management.
A. Design Freedom Meets User-Friendly Management: How PSD to WordPress Bridges the Gap
Designers often start their creative process in Adobe Photoshop, where they can meticulously layer elements, apply intricate effects, and fine-tune typography to achieve pixel-perfect designs. The flexibility of PSD files allows designers to conceptualize and refine their vision without the limitations often imposed by traditional web development frameworks.
However, the static nature of PSD designs poses challenges when it comes to dynamic content management and scalability. This is where WordPress excels as a robust content management system (CMS). By converting PSD designs into WordPress themes, designers retain the visual fidelity of their creations while gaining the ability to manage content effortlessly through an intuitive admin panel.
Key Benefits for Designers:
- Visual Consistency: Ensure that the website maintains its intended design aesthetics across various devices and screen sizes.
- Ease of Content Updates: Empower clients or team members to update text, images, and other content without relying on technical expertise.
- Scalability: Seamlessly expand website functionality by integrating plugins and extensions to meet evolving business needs.
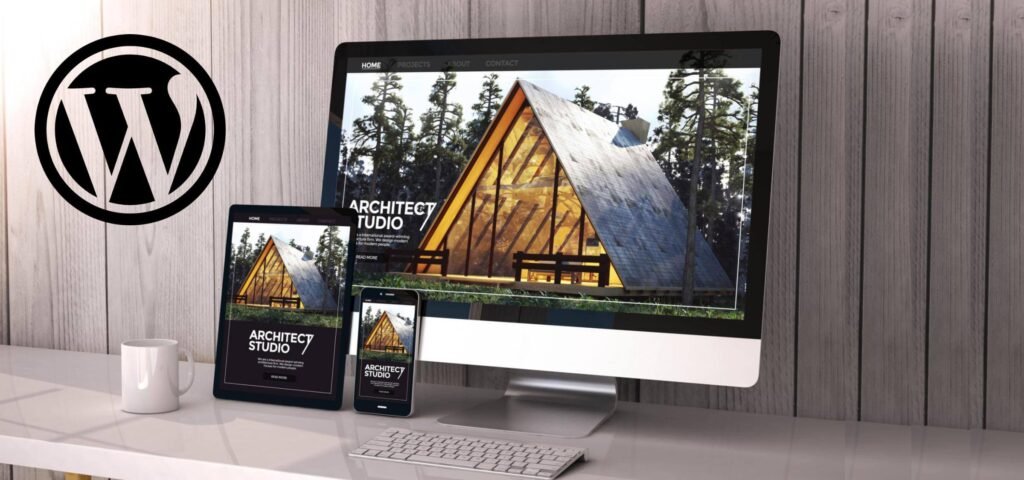
- Responsive Design: Implement responsive design principles to ensure optimal user experience on smartphones, tablets, and desktops.
This integration of design creativity with user-friendly website management not only enhances the efficiency of design workflows but also elevates the overall user experience, making PSD to WordPress conversion a strategic choice for designers aiming to deliver impactful web solutions.
B. Benefits for Everyone:
Aspiring Designers: Showcase Your Designs on a Functional Website
As an aspiring designer, converting your PSD (Photoshop Document) designs into WordPress themes offers significant advantages:
- Effective Showcase of Design Skills: PSD to WordPress conversion allows you to transform static PSD designs into fully functional websites. This transformation showcases your ability to create not just aesthetically pleasing designs but also user-friendly and interactive interfaces.
- Demonstration of Web Design Proficiency: By creating WordPress themes from your PSD files, you demonstrate proficiency in web design and development. Potential clients or employers can see firsthand how your designs translate into practical, dynamic websites that meet modern usability standards.
- Enhanced Portfolio: Including live WordPress websites in your portfolio enhances its credibility and demonstrates your versatility. It shows that you can deliver designs that not only look good but also perform well in a real-world digital environment.
- Career Opportunities: Having WordPress development skills alongside design expertise opens doors to broader job opportunities in the digital industry. Many businesses prefer candidates who can create and manage websites directly within popular CMS platforms like WordPress.
Business Owners: Breathe Life into Existing Design Assets and Gain Control
For business owners, especially those with existing PSD design assets, PSD to WordPress conversion provides numerous benefits:
- Revitalize Design Assets: Many businesses have extensive design assets created in PSD format for branding, marketing materials, or product mockups. Converting these PSD files into WordPress themes revitalizes these assets by making them functional and interactive on your website.
- Consistent Branding Across Platforms: Integrating PSD designs into WordPress ensures consistent branding across all digital platforms. Your website will reflect the same visual identity as your offline and online marketing materials, reinforcing brand recognition and trust.
- Content Management Simplification: WordPress offers a user-friendly content management system (CMS) that allows business owners and their teams to update website content easily. Whether it’s publishing new blog posts, updating product information, or adding promotional content, WordPress makes these tasks straightforward without needing extensive technical knowledge.
- Scalability and Flexibility: As your business grows, WordPress can scale with your needs. Whether you’re adding new products, expanding your service offerings, or launching marketing campaigns, WordPress’s flexibility allows you to adapt your website quickly to meet changing business requirements.
- Cost-Effectiveness: Compared to custom-built websites from scratch, PSD to WordPress conversion is often more cost-effective. It leverages existing design assets and integrates them into a robust, customizable platform, reducing development time and costs associated with building a website from the ground up.
By leveraging PSD to WordPress conversion, both aspiring designers and business owners can harness the power of WordPress’s CMS capabilities while showcasing their design assets effectively online. This approach not only enhances visual appeal but also improves usability and operational efficiency across the board.
Building Your WordPress Site: The Foundation for Success
A. Choosing the Right Home for Your Website: Shared vs. Managed WordPress Hosting Explained
Selecting the appropriate hosting plan is crucial when launching your WordPress site. Here’s an in-depth comparison of shared and managed WordPress hosting:
Shared Hosting: Affordable but Resource-Limited
With shared hosting, you may save money by having numerous websites use the same CPU, RAM, and storage space on a single server. It’s typically the entry-level choice for new websites and individuals on a budget. Shared hosting plans are easy to find and usually come with a user-friendly control panel for managing your site.
| Feature | Pros | Cons |
| Cost | Affordable | Limited Resources |
| Ease of Use | Beginner-friendly | Performance Variability |
| Accessibility | Widely available | Security Concerns |
| Scalability | Limited Upgradability | Limited Customization |
| Support | Basic Support Included | May Be Limited |
| Details | * Ideal for small websites, blogs, and personal projects. * Shared hosting plans are typically the most economical option. | * Shared server resources can impact performance if other sites experience high traffic. * Limited control over server configuration and resource allocation. |
| Details | * User-friendly interfaces like cPanel or Plesk simplify management tasks. * Often includes one-click installations for popular applications. | * Increased security risk due to shared environment. * Potential for security breaches if another site is compromised. |
| Details | * Upgrading to a different hosting plan may be necessary for significant traffic growth. * Limited ability to customize server settings or install specific software. | * Shared hosting providers may offer limited technical support compared to dedicated hosting plans, with longer wait times or less specialized assistance. |
Managed WordPress Hosting: Optimized Performance and Security
Managed WordPress hosting is tailored specifically for WordPress websites, offering enhanced performance, security, and support compared to shared hosting.
Key Features of Managed WordPress Hosting:
- Performance Optimization: Servers are configured to optimize WordPress performance, including caching mechanisms, CDN integration, and server-level caching.
- Enhanced Security: Providers implement robust security measures such as malware scanning, firewalls, regular updates, and automatic backups to protect your site from threats.
- Expert Support: Dedicated WordPress support teams are available 24/7 to assist with WordPress-specific issues, performance optimization, and troubleshooting.
Pros of Managed WordPress Hosting:
- High Performance: Dedicated resources ensure faster loading times and better site performance, even during traffic spikes.
- Security: Comprehensive security protocols and regular updates minimize vulnerabilities, providing peace of mind.
- Scalability: Easily scale resources as your site grows without worrying about server limitations.
Cons of Managed WordPress Hosting:
- Cost: Managed hosting plans are typically more expensive than shared hosting due to the specialized services and support provided.
- Less Control: Providers may limit certain customization options or server-level access, which can be a drawback for advanced users requiring specific configurations.
B. Installing WordPress: One-Click Simplicity or Manual Control?
After choosing your hosting plan, installing WordPress is the next step in setting up your website.
One-Click Installation: The Easiest Route for Most Beginners
Most hosting providers offer one-click installations through their control panels, such as cPanel, Plesk, or custom dashboards provided by the host. This method automates the entire installation process, making it incredibly straightforward for beginners to get started with WordPress quickly.
Steps for One-Click Installation:
- Access Control Panel: Log in to your hosting account and navigate to the control panel.
- Find WordPress Installer: Look for an icon or section labeled “WordPress” or “One-Click Installs.”
- Install WordPress: Click on the WordPress icon, select your domain name, and follow the prompts to complete the installation.
- Set Up Your Site: Once installed, you can log in to your WordPress dashboard and begin customizing your site.
One-click installations are ideal for users who prioritize simplicity and want to avoid manual configuration steps. It’s efficient and requires minimal technical knowledge, making it accessible to beginners.
Manual Installation: For Those Who Prefer More Control
Manual installation provides users with complete control over the setup process and is preferred by developers or users who require specific configurations.
Steps for Manual Installation:
- Download WordPress: Visit wordpress.org and download the latest version of WordPress.
- Upload Files: Use an FTP client (e.g., FileZilla) to connect to your hosting server and upload the WordPress files to your domain’s root directory.
- Create a Database: Log in to your hosting control panel (e.g., cPanel) and create a new MySQL database and user.
- Configure wp-config.php: Rename wp-config-sample.php to wp-config.php, and enter your database details.
- Run the Installation: Open your web browser and navigate to your domain. Follow the on-screen instructions to complete the installation.
Manual installation offers flexibility and allows users to customize settings such as database configurations, security measures, and advanced caching options. It’s suitable for users who have experience with web development or prefer a hands-on approach to setting up their websites.
C. Theme Selection: Dress Up Your Site (Optional)
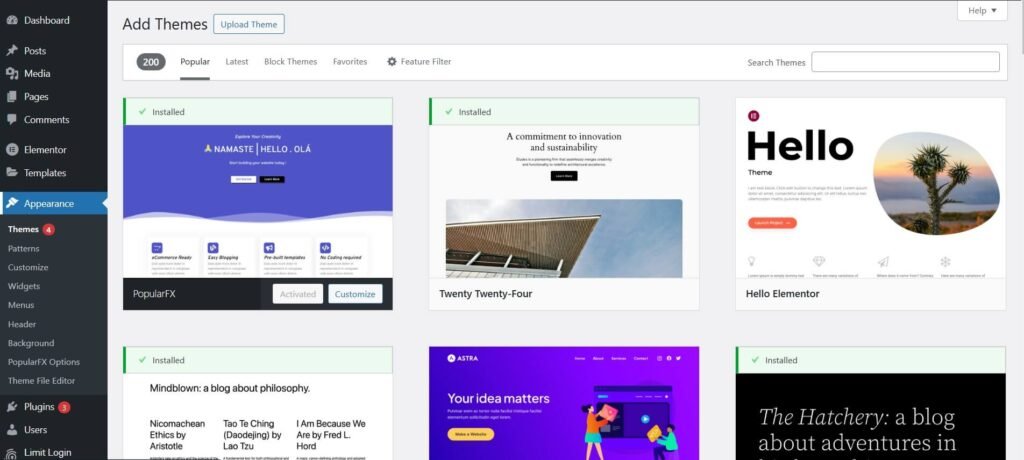
Once WordPress is installed, choosing the right theme sets the visual tone and functionality of your website.
Starter Themes: Your Blank Canvas for Customization
Starter themes, like Underscores or BlankSlate, provide a minimalist foundation for building custom WordPress themes from scratch. They offer basic styling, essential template files, and minimal design elements, allowing developers to create bespoke designs tailored to specific project requirements.
Advantages of Starter Themes:
- Customization Freedom: Complete control over design elements, layout, and functionality.
- Lean Codebase: Lightweight and optimized for performance, reducing bloat and enhancing site speed.
- Educational Value: Ideal for learning WordPress theme development and best practices in web design.
Starter themes are recommended for developers and designers looking to create unique, scalable WordPress themes that reflect their creative vision and technical expertise.
Feature-Rich Themes: Pre-Built Functionality to Jumpstart Your Website
Alternatively, feature-rich themes come bundled with extensive features, plugins, and customization options out-of-the-box. These themes are designed for users who want to launch their websites quickly with built-in functionalities such as page builders, eCommerce support, advanced customization panels, and responsive layouts.
Benefits of Feature-Rich Themes:
- Time Efficiency: Rapid deployment of a fully functional website without extensive customization or development time.
- Built-in Functionality: Integrated plugins and modules for adding sliders, portfolios, contact forms, and more.
- User-Friendly: Accessible to users with limited technical knowledge, providing a polished appearance and intuitive user experience.
Feature-rich themes are suitable for businesses, bloggers, and entrepreneurs who prioritize convenience, immediate functionality, and professional aesthetics for their WordPress sites.
Conversion Ninja: Turning Your PSD into a WordPress Masterpiece
A. Slicing Your PSD with Precision: A Step-by-Step Guide
Before transforming your PSD (Photoshop Document) into a WordPress website, mastering the art of slicing your design is essential. Here’s a detailed guide to help you through the process:
Demystifying Layers and Image Slices
PSD files are composed of layers that organize elements like text, images, and shapes. Understanding and organizing these layers is crucial for efficient extraction and optimization during the psd to wordpress conversion process.
Steps to Demystify Layers:
- Layer Organization: Ensure your PSD is well-organized with clearly labeled layers and groups, making it easier to manage and export elements.
- Simplify Layer Styles: Streamline layer styles to simplify the slicing process and ensure consistency across your web design.
- Optimize Images: Use Photoshop’s tools, such as Save for Web, to optimize images for the web by balancing quality and file size.
Mastering Slicing Tools in Photoshop (or Preferred Software)
Photoshop provides robust slicing tools that allow you to divide your design into smaller, manageable parts (slices) that can be individually optimized for the web.
Steps to Master Slicing Tools:
- Define Slices: Use the Slice Tool or Slice Select Tool to delineate areas of your design that will become separate image files.
- Optimize Each Slice: Customize slice properties to specify file formats (JPEG, PNG, GIF) and adjust settings like compression and quality for optimal web performance.
- Export Slices: Export each slice using Photoshop’s Save for Web feature, ensuring they are ready for integration into your psd to wordpress project.
B. Building the Blueprint: Pages, Posts, and Structuring Your Website
With your PSD design sliced and optimized, the next step is to create the foundational structure of your WordPress website:
Pages vs. Posts: Understanding the Difference

WordPress distinguishes between static pages and dynamic posts:
- Static Pages: Essential for permanent content like Homepage, About Us, and Contact Us pages.
- Dynamic Posts: Used for regularly updated content such as blog entries and news updates.
Creating Static Pages: The Essentials (Homepage, About Us, Contact Us)
Steps to Create Static Pages:
- Access WordPress Dashboard: Log in and navigate to “Pages” > “Add New” to create a new static page.
- Page Content: Add your page title, text, images, and other media using the Gutenberg editor or a page builder plugin.
- Customize Page Settings: Set featured images, select page templates (if applicable), and configure other page attributes.
- Publish Your Page: Click “Publish” to make your static page live on your psd to wordpress site.
C. Plugins: Your Toolbox for Functionality and Finesse
Plugins enhance your WordPress site’s capabilities, adding features and functionality tailored to your needs:
Essential Plugins Every Beginner Needs: Forms, Galleries, Sliders
Recommended Plugins:
- Contact Form Plugins: Install plugins like Contact Form 7 or WPForms to create and manage contact forms effortlessly.
- Gallery Plugins: Utilize plugins such as Envira Gallery or NextGEN Gallery to display images in stunning galleries on your psd to wordpress website.
- Slider Plugins: Implement slider functionality using plugins like Slider Revolution or MetaSlider to showcase featured content or products.
Choosing Plugins Based on Your Specific Website Goals: Ecommerce, Bookings, etc.
Targeted Plugin Selection:
- Ecommerce: Integrate WooCommerce to set up an online store, manage products, and process payments securely.
- Bookings: Use plugins like Bookly or Easy Appointments to enable online scheduling and appointment bookings directly on your psd to wordpress site.
By leveraging these plugins, you can customize and expand the functionality of your WordPress site to align with your business objectives, transforming your initial psd to wordpress design into a dynamic, user-friendly website.
Design Unleashed: Making Your Vision a Reality on WordPress
A. Importing Visuals: Images and Backgrounds that Impress
When bringing your design vision from PSD to WordPress, optimizing and integrating visuals effectively is key to creating a visually stunning website:
Image Optimization: Keeping Your Website Speedy (essential for SEO and user experience)
Optimizing images is crucial for maintaining fast loading times, which is vital for both SEO rankings and user experience on your psd to wordpress site.
Steps for Image Optimization:
- Choose the Right Format: Use JPEG for photographs and PNG for images with transparency.
- Resize Images: Scale images to the required dimensions before uploading to WordPress to reduce file size.
- Compression: Utilize tools like Photoshop’s Save for Web or plugins like Smush to compress images without losing quality.
- Lazy Loading: Implement lazy loading to defer off-screen images, improving initial page load times.
Using CSS to Craft Stunning Background Effects: Add Depth and Style with Code
CSS (Cascading Style Sheets) empowers you to enhance your psd to wordpress site’s design by creating captivating background effects:
Techniques for CSS Background Effects:
- Gradient Backgrounds: Use linear or radial gradients to add depth and color transitions.
- Background Images: Overlay textures or patterns to create visual interest.
- Animation: Apply CSS animations to backgrounds for subtle movement or attention-grabbing effects.
B. Customization Power: Fonts, Colors, and Styling Your Way
WordPress offers robust tools for customizing your site’s appearance, allowing you to tailor every detail to match your brand and design preferences:
The WordPress Customizer: Your Point-and-Click Design Hub (easy to use for beginners)
With the help of the WordPress Customizer, you can easily customize themes in real time by adjusting fonts, colors, backgrounds, and more:
Customization Features in WordPress Customizer:
- Site Identity: Upload logos, set site titles, and taglines.
- Typography: Change font styles, sizes, and colors across your site.
- Colors: Customize primary and secondary color schemes to reflect your brand.
- Backgrounds: Adjust background images or colors for different sections of your site.
Page Builder Plugins for Advanced Layouts (Optional): More Control Over Complex Layouts
For users seeking greater control over layout design beyond standard themes, page builder plugins provide drag-and-drop functionality and advanced customization options:
Popular Page Builder Plugins for WordPress:
- Elementor: Offers a live front-end editor with a wide range of widgets and templates.
- Divi Builder: Features a visual builder and pre-designed layouts for creating unique page designs.
- Beaver Builder: Provides modular drag-and-drop components for building responsive layouts.
These plugins empower you to create intricate layouts, add interactive elements, and design visually striking pages without needing extensive coding knowledge.
Launch Time: Taking Your Website Live with Confidence

A. Navigation Prowess: Setting Up Menus for Easy User Flow
Creating an intuitive navigation system is crucial to enhancing user experience on your psd to wordpress website:
Designing a User-Friendly Navigation Structure
A well-designed navigation structure ensures visitors can easily find information and navigate through your site:
Steps for Designing Navigation Structure:
- Plan Navigation Hierarchy: Organize pages logically to create a clear pathway for users.
- Use Descriptive Labels: Label menu items clearly to indicate what visitors can expect.
- Include Drop-down Menus: Group related pages under dropdowns to streamline navigation.
Assigning Menus to Different Locations on Your Website
WordPress allows you to assign menus to different locations, such as the main menu, footer menu, or sidebar:
Steps to Assign Menus:
- Access Menu Settings: Go to “Appearance” > “Menus” in the WordPress dashboard.
- Create or Edit Menu: Build your menu structure by adding pages, categories, custom links, or post types.
- Assign Menu Locations: Select where you want each menu to appear on your psd to wordpress site (e.g., primary menu, footer menu).
- Save Menu: Save your changes to apply the menu structure across your site.
B. Testing, Testing… 1, 2, 3: Ensuring a Flawless User Experience
Before launching your psd to wordpress site, testing is essential for identifying and resolving any issues:
Testing Functionality Across Different Devices
Ensure your website, is it responsive and functions seamlessly across various screen sizes and devices:
Steps for Cross-Device Testing:
- Use Responsive Design Tools: Test your site using tools like Chrome DevTools or online services to simulate different devices.
- Check Navigation: Verify that menus, buttons, and links are easily accessible and functional on mobile, tablet, and desktop views.
Troubleshooting Common Issues
Common Issues to Troubleshoot:
- Broken Links: Use tools like Broken Link Checker to identify and fix broken links before launch.
- Image Display: Verify images load correctly and are appropriately sized for different devices and resolutions.
C. Security and Maintenance: Keeping Your Website Safe and Sound
Protect your psd to wordpress site from vulnerabilities and ensure ongoing performance with these essential practices:
The Importance of Regular Backups
Schedule regular backups of your website data and files to safeguard against data loss due to unforeseen circumstances:
Backup Strategies:
- Automatic Backups: Use plugins like UpdraftPlus or BackupBuddy to automate regular backups to remote locations or cloud storage.
- Manual Backups: Create manual backups before major updates or changes to your site.
Keeping WordPress Core and Plugins Updated
Regularly update WordPress core files, themes, and plugins to patch security vulnerabilities and improve site performance:
Updating Process:
- WordPress Core: Enable automatic updates for WordPress core or manually update through the dashboard.
Plugins and Themes: Update plugins and themes regularly to access new features, bug fixes, and security patches.
Conclusion: You Did It! Now, Go Forth and Conquer!
A. The Power of Combining Design Freedom with WordPress Ease
In this journey from psd to wordpress, you’ve unlocked the potential to blend design creativity with the user-friendly capabilities of WordPress:
Design Freedom Meets WordPress Ease
By converting your PSD designs into a WordPress website, you’ve bridged the gap between intricate design elements and seamless functionality:
- Creative Expression: PSD to WordPress conversion allows you to translate complex design concepts into interactive and visually appealing web pages.
- User-Friendly Management: WordPress simplifies content management with intuitive tools for adding, editing, and organizing content without coding expertise.
B. Resources to Fuel Your WordPress Journey
As you embark on your psd to wordpress journey, leverage these resources to enhance your WordPress experience and further develop your website:
Essential Resources for WordPress Enthusiasts:
- WordPress Codex: Dive deeper into WordPress functionality and development with comprehensive documentation and guides.
- Community Forums: Engage with fellow developers and users on forums like WordPress.org/support to seek advice and solutions.
- Online Courses and Tutorials: Explore platforms like Udemy, Coursera, or LinkedIn Learning for structured learning paths on WordPress development and customization.
Tools for Continued Growth:
- Plugins for Enhanced Functionality: Discover plugins tailored to your needs, whether for SEO optimization, e-commerce integration, or performance enhancement.
- Themes and Templates: Explore premium themes or customize free themes to align with your brand and design preferences.
- Security and Maintenance Tools: Implement security plugins like Wordfence or Sucuri to protect your site against threats and ensure regular maintenance tasks are streamlined.
What is PSD to WordPress?
PSD to WordPress is the process of converting a Photoshop design file (PSD) into a functional WordPress theme. This involves translating the visual design into HTML, CSS, and PHP code that WordPress can use to render the site.
Why would I convert a PSD file to WordPress?
Converting a PSD file to WordPress allows you to transform a static design into a dynamic, content-manageable website. This provides greater flexibility, easy updates, and the ability to manage content without needing coding skills.
What are the steps involved in PSD to WordPress conversion?
Design Slicing: Break down the PSD design into individual images and elements.
HTML/CSS Coding: Convert the sliced design into HTML and CSS.
WordPress Integration: Develop WordPress theme files (PHP) to incorporate the HTML/CSS into a WordPress theme.
Testing: Ensure compatibility across different browsers and devices.
Can I convert a PSD file to WordPress myself?
Yes, if you have coding skills and knowledge of HTML, CSS, PHP, and WordPress theme development. For those less familiar with these technologies, hiring a professional developer or using a conversion service may be more efficient.
Are there any tools or services that can help with PSD to WordPress conversion?
Yes, there are tools and services available, such as:
Online Converters: Automated tools that can partially convert PSD to HTML/CSS, though they might require manual adjustments.
Professional Services: Agencies and developers specializing in PSD to WordPress conversions can handle the entire process, ensuring a high-quality outcome.


